Wednesday, February 22, 2012

Oven Baked Ribs

The title of this post is actually a little deceiving.  As evidenced by this article, country-style ribs are not actually ribs, but rather rib-like meat cut from the shoulder of the pig.  Regardless, I prefer country-style ribs to baby-back ribs since they provide more meat, fewer bones, and great flavor.  The beauty of this recipe is that it uses very few ingredients, is fairly inexpensive, and tastes better than any ribs I've ever had in a restaurant.  This recipe was adapted from my Mother-in-law's recipe, which was more spicy and tangy, while this is more sweet and less spicy.  It just all depends on how you like your ribs.  You can substitute any BBQ sauce for the one I used, but we really loved the flavor in this sauce.

Ingredients:
1 pack of pork country-style ribs (I usually use around 3-4 lbs)
Chicken Broth
1 28 oz bottle of Sweet Baby Rays Honey BBQ Sauce
1/4 - 1/3 cup of dark brown sugar
1 Tablespoon Lemon Juice


Here's how to make them:


This is the MOST important step in this whole process:  Double-line your pan with foil.  You will be very sad if you do not and you have to scrub baked-on, sticky, caramelized BBQ sauce off your pan.

Lay the ribs in the foil-lined  pan (it doesn't matter which side is up, but I try to put the fat side down).  They should fit snugly as they will shrink when they cook.

Pour enough chicken broth in the pan around the ribs so it comes about 1/4 inch up the ribs.  This will flavor the ribs and provide moisture as they cook.

Bake for 1 hour at 350 degrees tightly covered with foil.


Remove the ribs from the oven and drain all the liquid out of the bottom.  The ribs should look cooked and the liquid in the bottom of the pan will look gross.  Just drain it and move on.


Combine the BBQ sauce, brown sugar, and lemon juice well.


Pour over the ribs and use a basting brush to coat every inch of the ribs.  Use tongs to lift them up to get the sauce underneath them as well.

Cover again with foil (I used the same piece) and back for 1 1/2 hours at 350 degrees.


Pull them out and remove the foil (you won't need it again).  Use the basting brush again to cover the ribs with the sauce from the bottom of the pan and move the ribs around in the sauce to make sure they are fully coated.  At this point, the ribs should be so tender that they are falling apart.

Put the ribs back in the oven, uncovered for anywhere from 15-30 minutes.  I cranked up my oven to 450 degrees to cook some tater crowns so I only left the ribs in for about 10 minutes to avoid burning.  Remember there is a lot of sugar in these so they can burn easily.  Keep an eye on them.  It's better to pull them out too early than to overcook them.


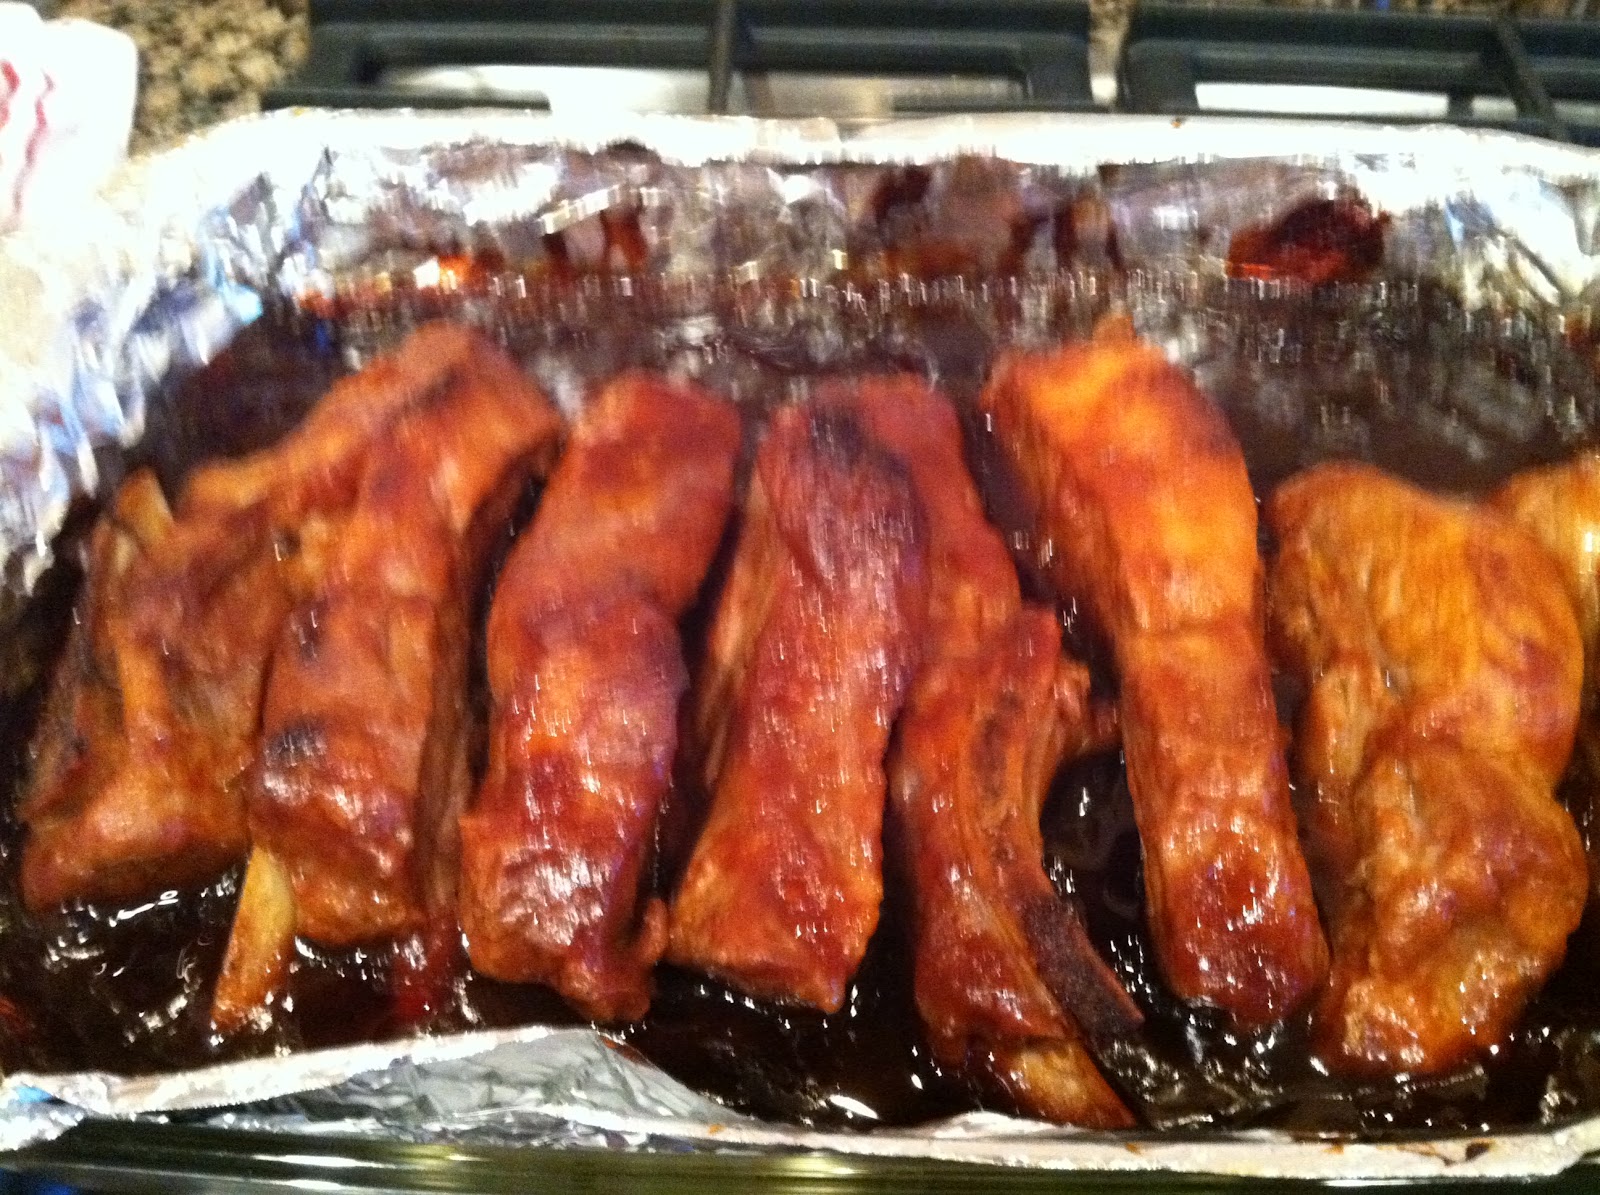
The tops of the ribs should look dark (not burned) and caramelized.


I just throw the pan on the table with some tongs and a spoon for the sauce and have at it.  The ribs will fall apart as you try to grab them with the tongs so you'll have to fish the meat out of the sauce.  Serve with baked beans and tater crowns for a meal even a four-year-old will love.


The Verdict:

This has become a favorite of Mr. Picky Pants.  We've had ribs twice in the last two weeks and both times we could not stop talking about how good they were.  It cost me only $6.50 for all the ribs, $2 for the BBQ sauce on sale, and nothing for the other ingredients I already had.  So we made enough ribs to feed two adults (with leftovers) for around $8.50 plus the cost of sides which was probably around $10.  That sure beats paying $19.99 a person for ribs that wouldn't taste nearly as good at a restaurant.  Mr. Picky Pants had baked potatoes with homemade ribs growing up, but I"m just too lazy to deal with that, so I resorted to tater crowns.  They are yummy with the sauce from the ribs on them.  These ribs are so good and so easy to make, you have to try them!

Sunday, February 5, 2012

Roasted Ranch Potatoes


I first started making this side dish using Pioneer Woman's recipe a few years ago, and ultimately tweaked it into this recipe.  The awesome thing about this is that it's cheap and goes with everything.  I like to make these when we grill or when I make something like Herbed Cheese and Chicken Pockets.

Ingredients:

Potatoes (I like Yukon Gold)
Wegman's Basting Oil (or any other oil)
Hidden Valley Ranch seasoning


Here are the simple directions:

 Dice the potatoes into large chunks leaving the skins on (that's where the nutrients are).

 Coat the potatoes with the basting oil.

 Coat with the ranch seasoning using more or less depending on your tastes.

Roast at 425 degrees for about 20-25 minutes or until the potatoes are soft.  The time will depend on the type of potato, the size of the chunks, and will inevitably take longer if you are crunched for time.

The Verdict:

Mr. Picky Pants always says he doesn't like these, but when I make them he eats them all and usually comments on how good they are.  He douses them in ketchup so I'm not sure he's actually tasting the potatoes, but I'll take it.  The basting oil is grapeseed oil with herbs so it's a healthy alternative to some of the other oils out there and the ranch seasoning provides a punch of flavor that would take tons of herbs to obtain.  They end up just tasting like well seasoned potatoes rather than really ranchy.  Try these out next time you need a side and are tired of the same old stuff.

Herbed Cheese & Chicken Pockets

I've determined that Mr. Picky Pants will do just about anything for crescent rolls.  I have to keep them on the other side of the table when I make them and only allow him to have one when he eats some of the protein or vegetable on his plate.  He can eat an entire tube of crescent rounds all by himself.  It's frightening.  His love of crescents got me thinking about putting the "healthy" food inside the crescents so I don't have to be the crescent roll gatekeeper.  This idea was so simple and obvious I was surprised I didn't make it sooner.

Ingredients (just 3):

  • 2 boneless chicken breasts (mine were frozen and thawed in the fridge) or 1 large breast butterflied                                                  
  • Crescent Rolls (any variety works, but the crescent sheets work the best since there are no seams)                                                   
  • Any kind of garlic or herbed cheese (Rondele and Aloutte are the ones I've used) or you can season up your own cream cheese to use   
Here's how it all comes together:


Trim all the fat off the chicken breasts and season with salt and pepper or seasoned salt (whatever you like).

Pan cook the breasts in oil or butter (I chose butter for flavor).  You could use grilled chicken also.  As long as it's fully cooked before it goes in the crescent dough, it doesn't matter how it's prepared.


Roll out the crescent dough.  The crescent sheets work best because there are no seams, but if you use regular crescents, just press the seams together to make sure they don't come apart.  Spread the garlic cheese on the dough leaving about a 1/2 inch border.


Place the cooked chicken breast in the middle of the dough.  I found it's easier if you let the chicken cool a little so it doesn't melt the cheese and the crescent dough.  Things get very sticky if they get too hot.


Put another sheet of crescent dough over the top, or roll the edges over to cover the chicken.  I'm still working on the technique here so they aren't the prettiest.


Bake for about 10-14 minutes (or whatever the package says).  Check to make sure the tops aren't getting too brown.  You're just cooking the dough since everything else is cooked, so don't go overboard.


Serve with some side dishes and you have a fun homemade hot pocket.  I served them with Roasted Ranch Potatoes and the flavors tied together beautifully.

The Verdict:

Mr. Picky Pants thought these were delicious.  Pan cooking the chicken made it really moist so there were no complaints about dryness.  A couple weeks later I made bite-sized versions for us to snack on and these were awesome also.  They were slightly time-consuming to make, but not overly.  I was just happy that Mr. Picky Pants will eat this with little complaint and without me having to cut him off from the rolls.  He requests this often and as long as I have chicken thawed, I'm happy to make it.  You can wrap anything you want in these crescents - sloppy joes, ham and cheese, turkey and swiss, the possibilities are endless.  Why buy Hot Pockets at the grocery store when you can make your own using ingredients you trust for not a lot of money?