Sunday, February 5, 2012

Herbed Cheese & Chicken Pockets

I've determined that Mr. Picky Pants will do just about anything for crescent rolls.  I have to keep them on the other side of the table when I make them and only allow him to have one when he eats some of the protein or vegetable on his plate.  He can eat an entire tube of crescent rounds all by himself.  It's frightening.  His love of crescents got me thinking about putting the "healthy" food inside the crescents so I don't have to be the crescent roll gatekeeper.  This idea was so simple and obvious I was surprised I didn't make it sooner.

Ingredients (just 3):

  • 2 boneless chicken breasts (mine were frozen and thawed in the fridge) or 1 large breast butterflied                                                  
  • Crescent Rolls (any variety works, but the crescent sheets work the best since there are no seams)                                                   
  • Any kind of garlic or herbed cheese (Rondele and Aloutte are the ones I've used) or you can season up your own cream cheese to use   
Here's how it all comes together:


Trim all the fat off the chicken breasts and season with salt and pepper or seasoned salt (whatever you like).

Pan cook the breasts in oil or butter (I chose butter for flavor).  You could use grilled chicken also.  As long as it's fully cooked before it goes in the crescent dough, it doesn't matter how it's prepared.


Roll out the crescent dough.  The crescent sheets work best because there are no seams, but if you use regular crescents, just press the seams together to make sure they don't come apart.  Spread the garlic cheese on the dough leaving about a 1/2 inch border.


Place the cooked chicken breast in the middle of the dough.  I found it's easier if you let the chicken cool a little so it doesn't melt the cheese and the crescent dough.  Things get very sticky if they get too hot.


Put another sheet of crescent dough over the top, or roll the edges over to cover the chicken.  I'm still working on the technique here so they aren't the prettiest.


Bake for about 10-14 minutes (or whatever the package says).  Check to make sure the tops aren't getting too brown.  You're just cooking the dough since everything else is cooked, so don't go overboard.


Serve with some side dishes and you have a fun homemade hot pocket.  I served them with Roasted Ranch Potatoes and the flavors tied together beautifully.

The Verdict:

Mr. Picky Pants thought these were delicious.  Pan cooking the chicken made it really moist so there were no complaints about dryness.  A couple weeks later I made bite-sized versions for us to snack on and these were awesome also.  They were slightly time-consuming to make, but not overly.  I was just happy that Mr. Picky Pants will eat this with little complaint and without me having to cut him off from the rolls.  He requests this often and as long as I have chicken thawed, I'm happy to make it.  You can wrap anything you want in these crescents - sloppy joes, ham and cheese, turkey and swiss, the possibilities are endless.  Why buy Hot Pockets at the grocery store when you can make your own using ingredients you trust for not a lot of money?

Tuesday, January 10, 2012

Chili Mac

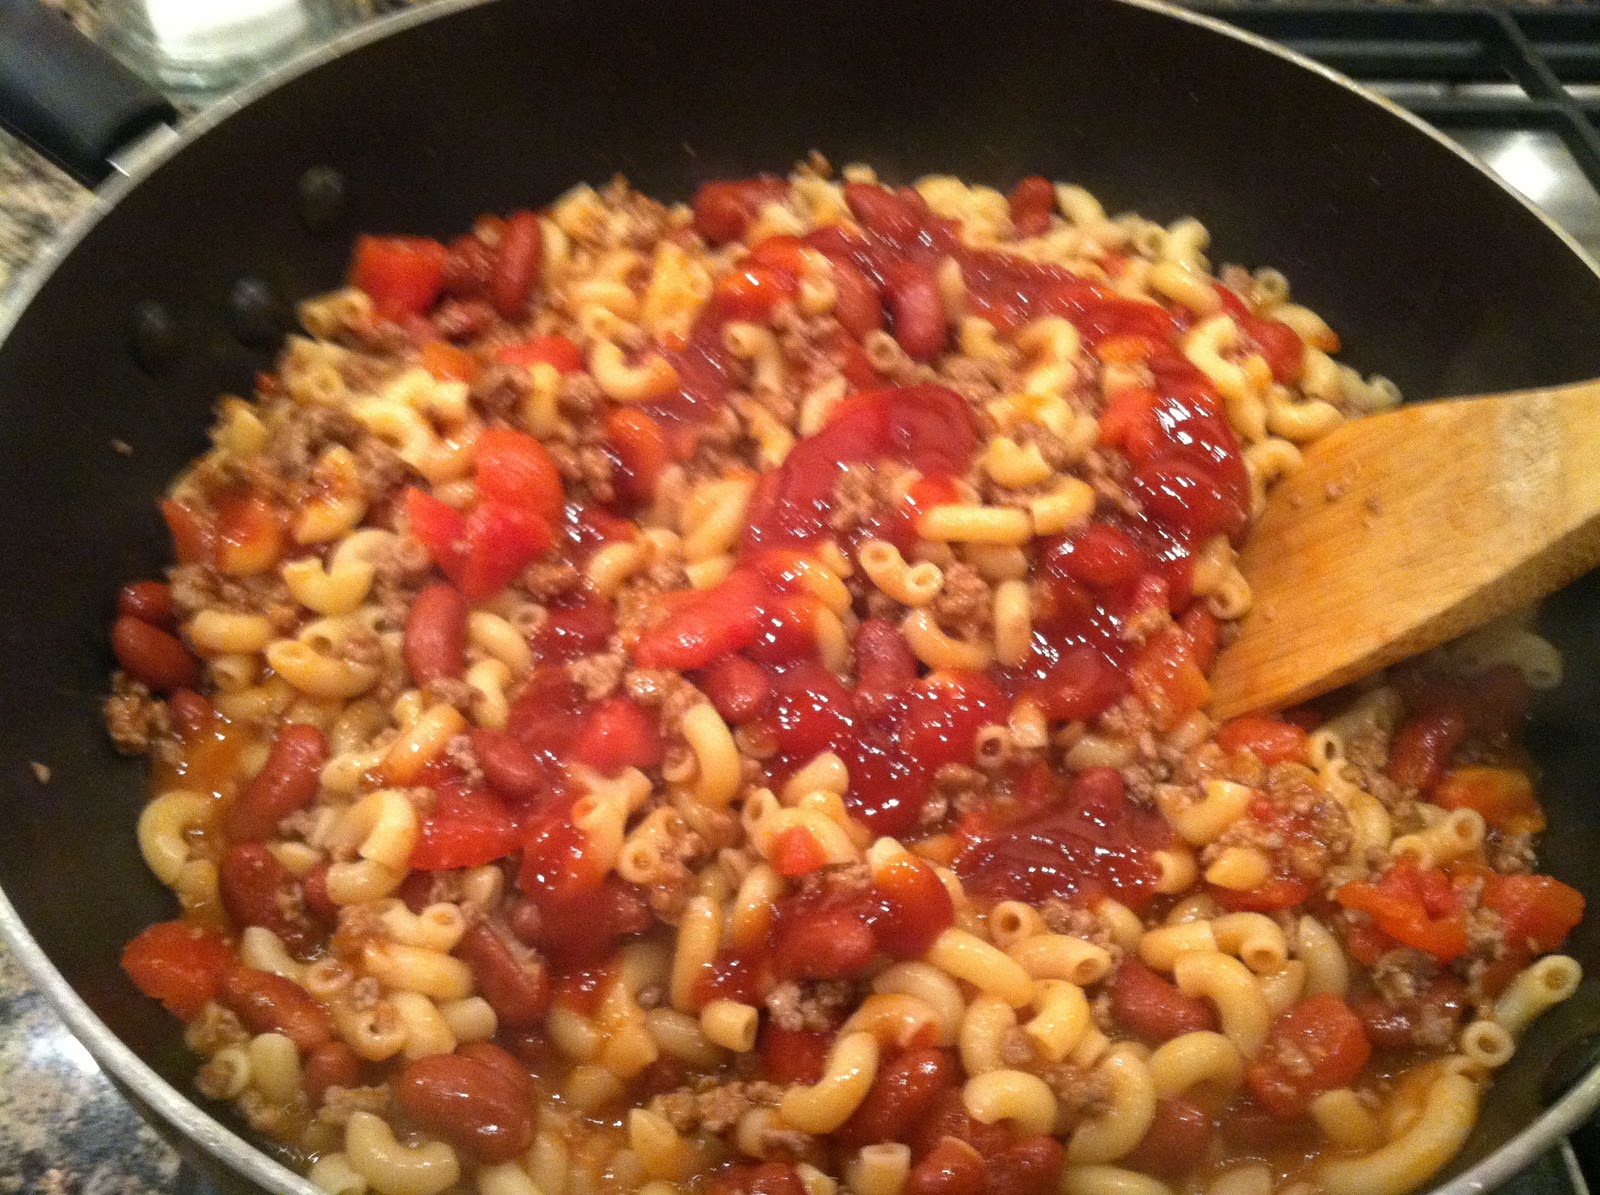
Chili Mac was a meal we had often growing up.  My grandmother used to make it when my dad was little and then my mom started making it after she and my dad were married.  I think one of the reasons why we had it so often was because it uses ingredients that are usually on hand and are fairly inexpensive.  I added the diced tomatoes and mixed cheese into the dish rather than just having it as a garnish.  To me, this is comfort food that makes my tummy very happy.

Ingredients:
1 lb. ground beef
1-1 1/2 cups uncooked macaroni or other short pasta
1 can diced tomatoes
1 can light kidney beans
Ketchup
Shredded Cheddar Cheese

Here's how it all comes together:


Begin cooking the pasta per the package instructions and brown the ground beef and drain.


Add the diced tomatoes (I usually drain them so it's not too soupy).


Add the can of kidney beans (you can drain or not, I drain a little of the liquid but don't rinse).


Add the cooked and drained macaroni or other pasta.


Mix it all together to combine and cook over medium-low heat.


Add enough ketchup to coat the entire mixture.  The amount will depend on how much you like and how the other ingredients absorb it.


Add in a handful (or more) of the shredded cheddar cheese.


Mix the cheese in to melt throughout the mixture.


This part is optional.  Place into a baking dish and top with some additional cheddar cheese and back at 350 degrees until melty.


Growing up we just served it right out of the skillet and topped it with additional ketchup and shredded cheese.  It's up to you how you want to serve it.


The Verdict:

Mr. Picky Pants tolerates this dish because I love it, but it's not his favorite.  He claims to not like the beans (even though I don't think you can really taste them).  This recipe is also a little like a recipe he ate growing up so I think he resents the fact that I won't make that and instead insist on making this one.  In an attempt to trick him I baked it in the casserole topped with cheese, but he said it didn't taste any different than usual.  either way, this is an easy recipe that is great as leftovers and provides a lot of protein without a ton of fat.  Even though it's not his favorite, Mr. Picky Pants will probably be eating this for years to come.

Apologies

I apologize for not updating this riveting blog in almost 3 months.  I've been writing and documenting recipes in that time, but haven't had a chance to sit down and post them.  One of the main reasons I have been so busy is I am nearing the end of my Master's degree and the holiday craziness didn't help either.  Within the next few months I will become Mama Schquigs, MPA and will be no more qualified to write this blog.  In addition to many other "resolutions" I am hoping to post one new recipe each week in 2012.  We'll see how that goes.  Feel free to yell at me if I start to fall behind again.

Thanks for reading!

Sunday, October 9, 2011

Chili Pie


This is an excellent appetizer to take to a party or just make to sit and watch football or a movie.  It takes only a few ingredients and takes just minutes to put together.  My mom used to make this all the time for family gatherings and would sometimes have to make 3 so there would be enough.  While this is not the healthiest recipe, it's worth the extra calories.


Ingredients:

1 8 oz package of cream cheese, softened
1 can of chili
Monterey-Jack cheese, shredded


Here's how you make it:


Spread the softened cream cheese in the bottom of a pie plate or similar size dish.


Pour the chili over the cream cheese and spread around.  I used Hormel Chili no beans, but you can use whatever chili you like.  I'd use about 1 cup or about an 8 oz can.  It's not an exactly science, so if you like more chili, add more chili.


Top with the monterey jack cheese.  You can put as much or as little as you like, but more is always better.


Bake at 350 degrees for about 15 minutes to melt the cheese and warm it through.


It'll be messy to scoop out, but that's part of the deliciousness.


Serve with tortilla chips.  It's looks like a mess, but it's a yummy mess.  It also reheats really well in the microwave, so don't worry if you have leftovers (though I don't think you will).


The Verdict:

Mr. Picky Pants tried one bite of mine and decided it tasted like super nachos.  Considering that Chili Pie has NONE of the same ingredients as super nachos, I'm not sure how he came to this conclusion.  I think he already had his mind made up that he wasn't going to like this before he tried it.  Needless to say, this is a recipe that most everyone loves (Mr. Picky Pants excluded).  I promise it tastes nothing like super nachos, and it's a fun fall food to make for sitting around watching football on TV.

Friday, October 7, 2011

Pot Roast

I grew up eating brisket that my grandmother and mother made for big weekend dinners.  When I started cooking for myself, I wanted something with more flavor so I started making my own version of pot roast.  I developed a rub for the meat and my own method.  This method allows for a moist and delicious roast without a lot of effort.  I usually make this on a weekday when I work from home since it just sits in the oven all day.

Ingredients:

1-2 lb. chuck roast
Post Roast Rub (see recipe below)
1 onion, sliced
Carrots, sliced (or baby)
Beef Broth or Beef Bullion + Water

Pot Roast Rub
 
1/2 cup Paprika
1/3 c. Brown Sugar
3 Tablespoons Garlic Powder
3 Tablespoons Onion Powder
2 Tablespoons Oregano

Combine together and store in an airtight container.


Here's what you do with the rub:


First I take a few Tablespoons of the rub and massage into the chuck roast.  Make sure to get all sides and nooks and crannies to get maximum flavor.


Brown in an dutch oven or other heavy pan in a little vegetable oil on high heat.  Flip to sear both sides and I try to get the sides also using tongs.  This makes sure the outside gets nice and brown and keeps the moisture in the meat.


Next, add the sliced onion and mix around to get coated with the spices in the oil.  Let it soften for a few minutes.


Add enough beef broth or bullion mixed with hot water to come about 3/4 of the way up the roast.  The amount will vary depending on the size of the pan, size of the roast and amount of onions, but I usually use around 2-3 cups.


Add some sliced carrots or baby carrots.  These get nice and soft when cooked at the end and also make the meat super sweet and yummy.

Cover and bake in a 325 degree oven for at least 3 hours.  I check mine hourly to ensure all the liquid has not cooked out.  If you see that the liquid is low, add another cup of broth.


I meant to take a photo of the roast completed, but I forgot.  And this photo of the finished plate really doesn't do it justice.  The meat comes out so tender that you can shred it with a fork.  Serve with mashed potatoes and rolls to sop up the yummy gravy.

I forgot to document how to make the gravy, so here's the recipe without pictures.

Ingredients:

Drippings from the roast, strained
2 Tablespoons flour
1/2 cup milk

1. Put the drippings in a pan (I use the same dutch oven I made the roast in) and bring to a low boil.  2. Add the flour to the milk and slowly pour into the heated drippings while whisking vigorously.
3. Bring back to a boil and let cook on a lower heat until it starts to thicken.

Voila!  You have gravy.


The Verdict:


Mr. Picky Pants really enjoys this recipe.  He doesn't really request it that often, but he eats it readily when I make it.  I think his favorite part of the meal is the rolls (thanks Pillsbury!).  I have to limit him on the number he can eat so he doesn't fill up on rolls and not eat any meat.  Mr. Picky Pants has commented on numerous occasions that this is the best roast he's ever had and I'd have to agree.  It's a delicious meal to make when it starts getting chilly and it's really a snap to make.