Monday, March 3, 2014

Beef Noodle Skillet


A couple years ago I had a vision of a dish that combined the flavors of our typical meatloaf dinner into one meal.  Growing up, we usually had meatloaf, fried noodles, and corn.  These flavors went so well to me that I couldn't understand why we hadn't thought to make it into one dish.  While visiting my parent's house, I decided to try it out.  While describing it to my mom, she said that she was pretty sure she once had a recipe for something similar.  I dug through her recipe box and found this:


This is a really old recipe off a can of Del Monte tomatoes.  My mom had apparently made it at some point and I guess took it to an office party.  She said she was pretty sure this was before I was even born or when I was very young.  I guess I wasn't the only person with the vision of this delicious combination.

By accident, this recipe is adapted from Del Monte's Macaroni Beef Supper.

Ingredients:
1 lb. ground beef
1 small onion chopped
1 can corn, drained or 1 cup of frozen corn, thawed
1 can tomatoes (whole, diced, whatever you've got)
1/2 c. ketchup
1/2 package egg noodles, boiled and drained

This one is super easy, and the order of operations doesn't matter much.


Put your water on to boil for the egg noodles.  Brown the ground beef and onion until no longer pink.  Drain off the fat.  

P.S.  It's really hard to take a good photo of meat browning because of all the steam!


Add the tomatoes (break them up if whole), corn, and ketchup.  Mix to combine.


When the noodles are cooked, drain and add to the beef, corn, tomato mixture.


Stir to combine and add more ketchup if desired.  You want the noodles to be pretty moist, so you may need more ketchup if they look dry.


Scoop it right out of the skillet and serve with biscuits for a delicious meal.


The Verdict: 
I don't have a Mr. Picky Pants review for this recipe since he wasn't there to try it.  However, my parents and I both thought it tasted really delicious.  It was so easy to make, it's definitely one to keep on hand for those hectic evenings.  It's a complete meal all in one and is filling.  Give this one a shot when you just have no idea what to make.  I'll bet you have everything in your pantry.

Sunday, January 5, 2014

Spaghetti

This recipe is from Mr. Picky Pants' mom.  This is how she makes her spaghetti and I think it's a great way to "doctor" some jarred pasta sauce into a more robust meal.  You can use any brand of pasta sauce you like.  Just make sure it's meat-free since you're adding meat.  You can add any veggies you like or omit whatever you don't.  I like that I can alter this depending on what I have on hand and it usually tastes about the same.
Ingredients:

1 lb ground beef
1 small onion,  diced
1 - 2 cloves garlic,  minced
1 small green pepper,  diced
1 T. Italian Seasoning
1/2 tsp. celery seed
salt/pepper
1 can stewed tomatoes, diced (you can also use just diced tomatoes)
1 jar pasta sauce (marinara)
2 good handfuls of dried Spaghetti noodles

Here's how to pull it all together:


Brown ground beef until no longer pink.


While the beef is browning, dice up your onion and pepper.  I used red pepper since that's what I had.  The color of the pepper tends to only affect the sweetness.  Green pepper is a bit stronger and a little more bitter than red which is sweeter.  Use whatever peppers you have on hand.

**Tip**  You can freeze peppers for use in recipes like this.  Just cut in half and remove the seeds/stem, put in a resealable bag, and toss in the freezer for the next recipe. 


Once the meat is browned, it's up to you if you want to drain it.  If you have really lean beef, you probably don't need to.  See how much fat has accumulated and make the call for yourself and your family.  We don't normally drain this unless I'm using less than 85% fat.

Add your onion and peppers and the minced garlic.  Stir to combine and get those veggies cooking.


Add your tomatoes.  The original recipe calls for stewed tomatoes which contain onions, celery, and bell peppers.  Since these are already present in this recipe, it's not vital that you use stewed tomatoes.  Additionally, they only come as whole tomatoes which requires you to dice them up.  I'm all about cutting steps, so I've taken to using diced tomatoes.  I sometimes use the seasoned diced tomatoes with oregano, garlic, whatever I have.

Drain the juice into the meat mixture when you add the tomatoes.


Add all your seasonings at this point.  Mix it all together to combine.


Now add your pasta sauce.


Stir it all together and let it simmer for a bit to let the flavors combine. 

Cook your dried spaghetti noodles in boiling water according to the package instructions.  We use about two good handfuls of noodles for this recipe. 


Add the cooked, drained spaghetti noodles to the sauce and let simmer on the stove for about 10-15 minutes or longer.  Cover with a lid to prevent splattering.  

This is even better the next day, so don't stress about making too much.  It's even better if you make it in the morning and put it in the fridge and then pull it out and heat it up on the stove for dinner.  Yum!

The Verdict:

Mr.  Picky Pants loves this.  Since he grew up with it, it's one of his comfort foods.  He's even capable of making this himself (though it's a bit of a production).  This is definitely something we have often.  Overall it's a pretty healthy recipe...until you eat an entire loaf of garlic bread yourself.  But we don't talk about that.  Enjoy!

Sunday, September 8, 2013

Italian Chicken-Zucchini Skillet

This recipe was adapted from this recipe from Hunts.

This was something I threw together after googling a few ingredients one crazy evening.  I am trying to really watch what I eat and eliminate as many processed and unnecessary ingredients as possible.  The benefit of this dish is that it has tons of veggies and cooks really quickly and in one pan!

If you have really hungry folks, you may need to add some pasta to increase the staying power of this.  Or you could add more chicken to increase the protein. If you are going to mix with pasta, you may want to add some tomato sauce to make it less dry.

Ingredients:
Boneless Chicken (I used about 4 chicken tenders; about 1 lb)
Herb and White Wine marinade (or Italian dressing/marinade)
Cooking Spray
1 can diced tomatoes with Basil, Garlic & Oregano (or whatever Italian blend you enjoy)
1/2 small onion diced
1-2 zucchinis peeled and sliced
Parmesan cheese

Here's How it all Comes Together:

1. Dice the chicken into bite sized pieces.
2. Marinate the chicken for about 15 minutes in marinade.
3. While the chicken in marinating, dice up your veggies.
4. Spray a large skillet with cooking spray.
5. Cook chicken in skillet until no longer pink.
6. Add veggies and undrained tomatoes.
7. Cook for about 15-20 minutes or until the zucchini is tender.
8. Garnish with Parmesan cheese.
9. Serve over pasta (orzo, rotini, penne, etc.)

The Verdict:
Mr. Picky Pants actually really liked this.  It was a little to "light" for him, so he would benefit from the pasta as I noted above or an additional side with some carbs.  I was really surprised he enjoyed it since it had so many veggies in it, but he said it was actually quite tasty.  I was just happy I didn't have to make him a separate dinner. 


Monday, August 19, 2013

Lifeway Kefir


As a participant in Influenster, I received a coupon for a free Lifeway Kefir product.  I grabbed the Lowfat Kefir Cultured Milk Smoothie in Strawberry Banana.


Well, tonight I gave it a try.  It has a good flavor, but the overall kefir flavor was just too sour for my liking.  So, I decided to "enhance" it a bit.


Ingredients:
1 cup Lifeway Kefir Smoothie in Strawberry Banana (most flavors would work)
1/3 cup Vanilla Greek Yogurt
1 cup frozen blueberries (or your favorite berry)
1 T honey

Here's the easy part:
Combine it all in the blender and blend.

The result is a tangy, sweeter smoothie with all the benefits of the kefir.


Unfortunately this is not something that Mr. Picky Pants would even dream of tasting, so I didn't even try.  Oh well, his loss.

Please note:  I received these products complimentary from Influenster for testing purposes.

Monday, May 27, 2013

Tastykake® Kandy Bar Kakes

I am participating in a testing program called VoxBox from Influenster.  I received a really fun box of goodies to test out and share my opinions.  I know this blog isn't really designed for this, but since it's food related, and Mr. Picky Pants related, I figured I give it a shot.

The first thing Mr. Picky Pants saw when I opened the box was the Tastykake Kandy Bar Kake - S'mores flavor.  He grabbed it out of the box before I knew what happened.  I've been trying to prevent him from eating it for a couple days, but gave in today.  I didn't even get a picture of the cake, just a sad, empty wrapper.


Having had MANY S'mores treats before, Mr. Picky Pants expected this to be messy - as most are.  Usually the graham cracker portion crumbles when you bite into it.  He was pleasantly surprised when it was a moist, soft cake surrounded in chocolate with a marshmallow filling.  Needless to say, we'll be looking for these in the near future.

Visit http://www.tastykake.com/ for more information.

**I received these products complimentary from Influenster for testing purposes.**

Friday, January 11, 2013

Cheesy Chicken Biscuits

This is a new take on Chicken Tortilla Bake but slightly more Picky Pants friendly.  The cheesy chicken mixture is the same as in the chicken tortilla bake.  The biscuit part is literally just canned biscuits (though I suppose you could make your own if you're cool like that).  It was actually pretty easy and they came out much better than I expected.

Ingredients:
1 can refrigerated biscuts
Boneless Chicken
1 can of cream of chicken soup
1/2 cup chicken broth
1/2 small onion
1-2 cups cheddar cheese (enough for the tops reserved)
1 cup peas/broccoli or any other frozen or canned veggie

I don't have pictures of making it, but it's pretty simple and you can refer to the Chicken Tortilla Bake recipe for help.

To start, spray a muffin tin with cooking spray.  Cut the biscuits in half like you would when they are baked so you have two discs for each one. 

Roll each half biscuit into a disc large enough to fill one muffin cup.

Press into the muffin cups so they come up the sides as far as possible.

Bake these unfilled following the directions on the can of biscuits for about 8-10 minutes.  About half way through pull them out and push down the middles since they puff up (you need this space for the filling).

While the biscuit cups are baking, brown the chicken and onion and combine the remaining ingredients in a bowl.

Pull out the biscuit cups when they are done baking and push down the middles again.

Fill each biscuit cup just to the top with the filling (don't overfill or you'll make a mess).  Top each cup with a little extra shredded cheese.

Bake for about 5 minutes more - keep an eye on them so the biscuits don't get too brown.  Remember you're just heating the filling through and melting the cheese.

Once they are done, they should pop right out and be ready to eat.

The Verdict:
Mr. Picky Pants really liked these.  They were devoured quickly and were easy to eat.   These were definitely a meal fit for a 4-year-old since they combine all the food groups into one little package that's fun to eat.  I will definitely be making these again and will probably try new fillings.  I'm thinking of a sloppy joe biscuit next.

Friday, October 12, 2012

Chicken Tortilla Bake

My mom adapted this recipe from one she found in a magazine years and years ago.  This dish is like a chicken pot pie with tortilla shells as lasagna layers.  It's creamy and cheesy and really yummy.  It was a little chilly today and this was a nice fall meal to warm you up and satisfy.
The nice thing about this recipe is that you can adapt it however you like.  My mom used to make it with broccoli, but now we make it with peas.  Put anything you like in here to make it your own.

I learned something about myself recently: I have a compulsion for buying tortillas every time I'm at the grocery store.  This is what is currently in my fridge.  Notice I buy a different kind each time.  I think I need some kind of therapy...


I also learned that I'm not very good at keeping up with this blog.  Hopefully I can improve on that in the near future.


Ingredients:
Boneless Chicken
Flour Tortillas
1 can of cream of chicken soup
1/2 cup chicken broth
1/2 small onion
1-2 cups cheddar cheese
1 cup peas/broccoli or any other frozen or canned veggie

Here's how it all comes together:

Cut chicken into small chunks and brown in some olive oil (and splatter it all over you stove).  Use whatever seasoning you like.  I used seasoning salt, but you can just use salt and pepper or anything you like.  Towards the end of the chicken browning, add the 1/2 onion diced to soften it and mellow the flavor a bit.

Combine the cooked chicken/onions, soup, broth, and peas in a bowl.

 Ignore the blurriness of this photo.  Line the bottom of a pan with tortillas (cut to fit).  Spread 1/2 of the chicken/soup mixture over the tortillas.

Top the layer of chicken/soup mixture with 1/2 the cheese.  You can make this as cheesy as you'd like.  

 Add another layer of tortillas over the cheese.

 Repeat the layers again, ending with cheese on top.

 Bake at 350 degrees for about 30 minutes.

 The result is a delicious, creamy, cheesy, hearty dish.

The Verdict:

Mr. Picky Pants didn't remember having this before, but he ate it willingly and enjoyed it.  He wasn't the biggest fan of the tortillas, but he never is.  He said it would taste better over biscuits so we may give that a try next time.  Overall, this was a hit and he agreed it was good and he would eat it again.  That's a win in my book.

Sunday, July 22, 2012

Turkey Meatloaf Muffins


Mr. Picky Pants and I are trying to eat better and lose weight.  So far he's lost 22 lbs and I've lost 15 lbs.  Our main focus is eating a lot of veggies and lean meats.  This is a recipe I came up with to use ground turkey and incorporate some veggies without a lot of fat.

Ingredients:

1 lb. ground turkey
Chopped Mushrooms
Chopped/Diced Onion
Creole Seasoning (I used Tony Chacheres)
Shredded Mozzarella Cheese
Cooking spray
Here's how to make it:

Saute the onions and mushrooms in a little olive oil to soften.  Add about 1/2 tsp. of the Creole Seasoning to help draw out the liquids and continue to brown them.


Make sure to thoroughly spray your muffin tin.  You will never get them out if you don't do this!


Combine the ground turkey, onion and mushrooms, additional Creole Seasoning (to taste), and 1/2 cup of shredded Mozzarella cheese.  Mix it with your hands to make sure it's well combined.


Form into balls and press into the muffin tin.  Bake at 350 degrees for 30-45 minutes.


This is what they look like when they are done.


Serve with veggies to complete the meal.  We're not doing separate starches with dinner (like potatoes or rice), so we had cauliflower and corn on the cob.


The Verdict:

Mr. Picky Pants enjoyed this.  He put ketchup on his muffins, which is fine.  We both thought there was a bit too much seasoning in them, so I'll dial it back a bit next time.  Overall, this meal left us feeling satisfied and full and provided plenty of flavor.  The Tony Chacheres that I used has a fair amount of sodium, but they do make a salt-free version so I'll be looking for that soon.  Overall, this is a great way to use ground turkey and add lots of flavor to make a satisfying meal.

Wednesday, March 14, 2012

The Stir-Fry Incident

Last night I made a simple chicken stir-fry in an attempt to have a healthy dinner made relatively quickly.  I used a bagged stir-fry with the sauce packet (yes, I cheated) but I used my own chicken so that stands for something, right?  So, I make this lovely stir-fry with all sorts of veggies and chicken in a sweet teryaki sauce and serve it over white rice.  Mr. Picky Pants first asked me if it smelled good or like feet?  What?!?  I assured him it did NOT smell like feet.  We sit down to eat and he picks at it and eats the chicken out leaving all the veggies and rice in the bowl and disappears into the kitchen.  A few minutes later he comes back with a plate of hot dogs and tater tots.  Needless to say, I think this sums up my taste in food versus Mr. Picky Pants' taste in food.  I prefer to eat a flavorful, healthy stir-fry, and he prefers to eat a kids meal off the Denny's menu.  I can't win!

Friday, March 9, 2012

Taco Night!

Growing up it was always fun when we had tacos for dinner.  My Aunt Penny made up the name "burros" for soft tacos since they were kind of a cross between tacos and burritos.  Everyone has their own "recipe" for homemade tacos and my family is no different.  We always had vegetarian refried beans, taco seasoned beef, lettuce, tomato, shredded cheese, and sour cream wrapped up in a flour tortilla.  Since this is how I grew up eating tacos, this is how I make them now only I try to use ground turkey instead of beef and I make my own taco seasoning when I have time and ambition.

Come to find out, Mr. Picky Pants never had tacos of any kind growing up - at home or at a restaurant.  In fact he told me he didn't even go to a Taco Bell for the first time until he was in high school.  Apparently his family didn't enjoy the Mexican food.  Needless to say, there was a definite learning curve for assembling and eating homemade tacos.  Being the four-year-old that he is, Mr. Picky Pants insists that I assemble his taco for him since I "do it best".

I don't really have a recipe to share, but I will share how I make my homemade taco seasoning.  If I was smart, I would make a large batch and store it like my pot roast rub, but I haven't done it yet.

Homemade Taco Seasoning

1 Tablespoon Chili Powder
1/2 teaspoon Garlic Powder
1/2 teaspoon Onion Powder
1/2 teaspoon Paprika
1 1/2 teaspoon Cumin
1 teaspoon salt
1/2 teaspoon black pepper

Mix all the seasonings together.  To use for taco meat, mix into browned and drained beef or turkey with 2/3 c water and let it simmer until most of the water is absorbed.

Wednesday, February 22, 2012

Oven Baked Ribs

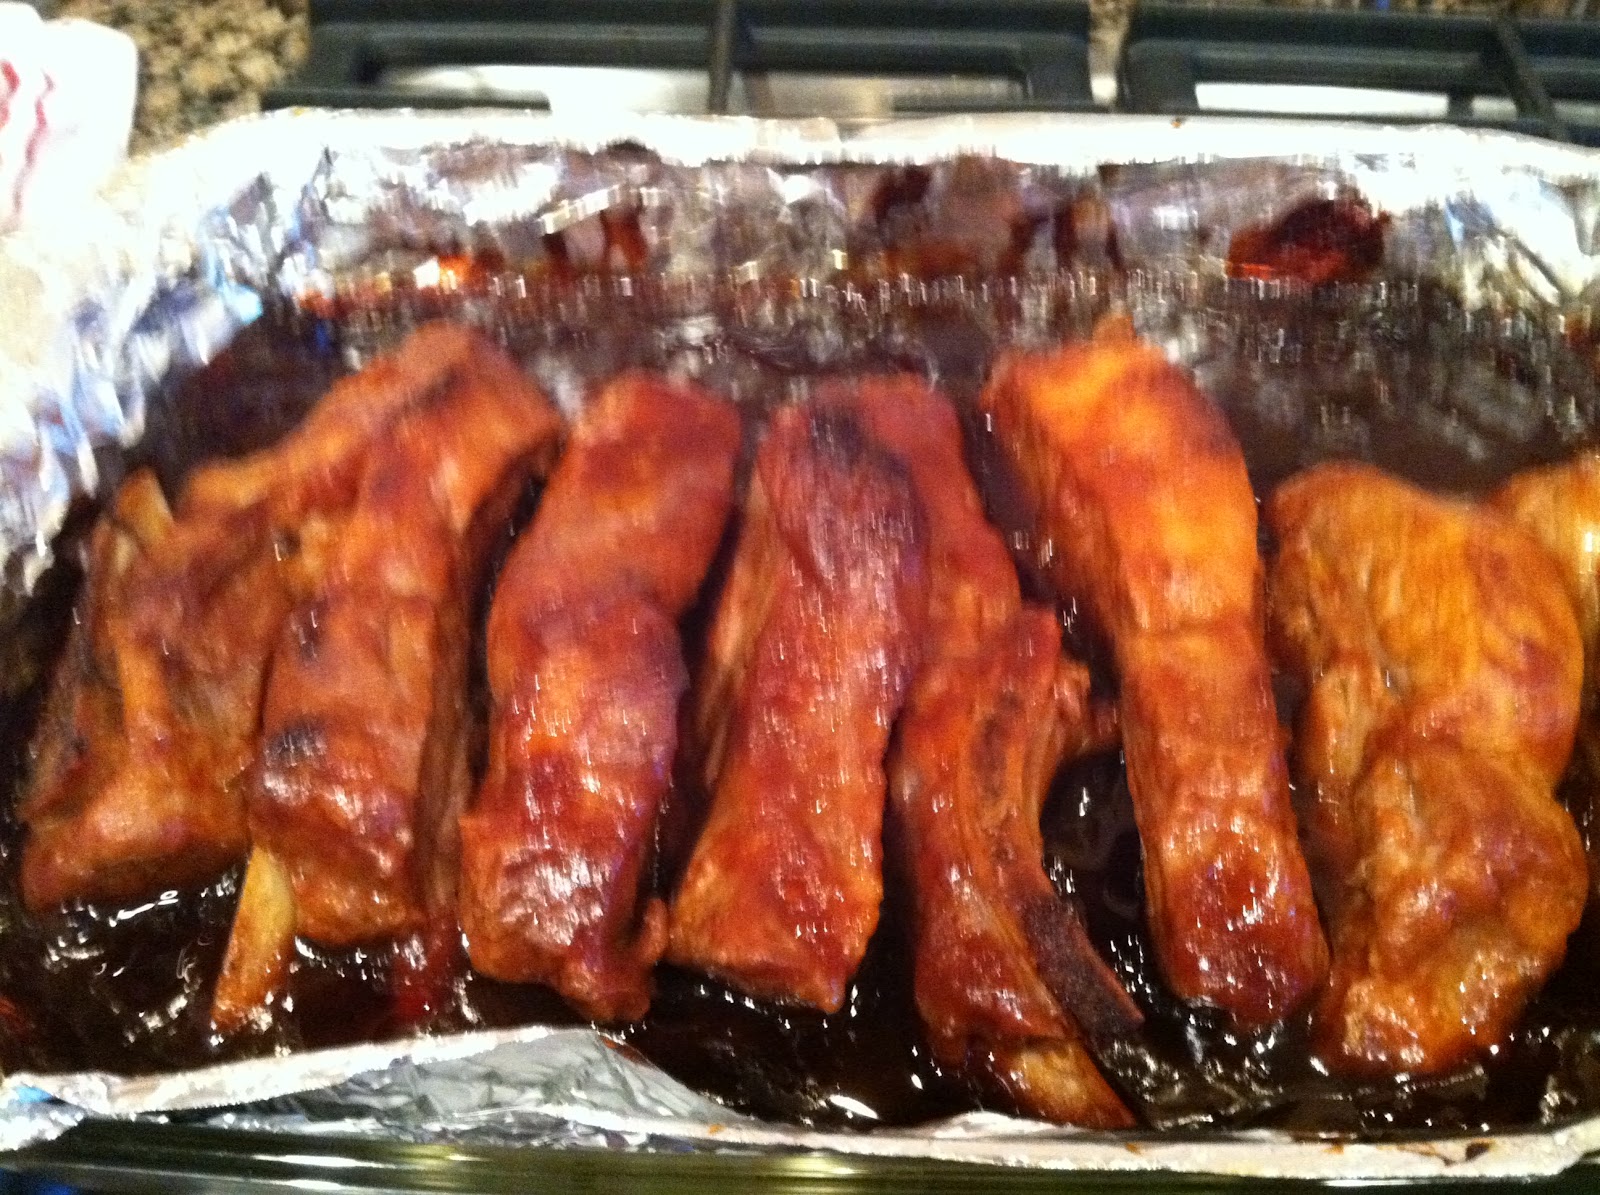
The title of this post is actually a little deceiving.  As evidenced by this article, country-style ribs are not actually ribs, but rather rib-like meat cut from the shoulder of the pig.  Regardless, I prefer country-style ribs to baby-back ribs since they provide more meat, fewer bones, and great flavor.  The beauty of this recipe is that it uses very few ingredients, is fairly inexpensive, and tastes better than any ribs I've ever had in a restaurant.  This recipe was adapted from my Mother-in-law's recipe, which was more spicy and tangy, while this is more sweet and less spicy.  It just all depends on how you like your ribs.  You can substitute any BBQ sauce for the one I used, but we really loved the flavor in this sauce.

Ingredients:
1 pack of pork country-style ribs (I usually use around 3-4 lbs)
Chicken Broth
1 28 oz bottle of Sweet Baby Rays Honey BBQ Sauce
1/4 - 1/3 cup of dark brown sugar
1 Tablespoon Lemon Juice


Here's how to make them:


This is the MOST important step in this whole process:  Double-line your pan with foil.  You will be very sad if you do not and you have to scrub baked-on, sticky, caramelized BBQ sauce off your pan.

Lay the ribs in the foil-lined  pan (it doesn't matter which side is up, but I try to put the fat side down).  They should fit snugly as they will shrink when they cook.

Pour enough chicken broth in the pan around the ribs so it comes about 1/4 inch up the ribs.  This will flavor the ribs and provide moisture as they cook.

Bake for 1 hour at 350 degrees tightly covered with foil.


Remove the ribs from the oven and drain all the liquid out of the bottom.  The ribs should look cooked and the liquid in the bottom of the pan will look gross.  Just drain it and move on.


Combine the BBQ sauce, brown sugar, and lemon juice well.


Pour over the ribs and use a basting brush to coat every inch of the ribs.  Use tongs to lift them up to get the sauce underneath them as well.

Cover again with foil (I used the same piece) and back for 1 1/2 hours at 350 degrees.


Pull them out and remove the foil (you won't need it again).  Use the basting brush again to cover the ribs with the sauce from the bottom of the pan and move the ribs around in the sauce to make sure they are fully coated.  At this point, the ribs should be so tender that they are falling apart.

Put the ribs back in the oven, uncovered for anywhere from 15-30 minutes.  I cranked up my oven to 450 degrees to cook some tater crowns so I only left the ribs in for about 10 minutes to avoid burning.  Remember there is a lot of sugar in these so they can burn easily.  Keep an eye on them.  It's better to pull them out too early than to overcook them.


The tops of the ribs should look dark (not burned) and caramelized.


I just throw the pan on the table with some tongs and a spoon for the sauce and have at it.  The ribs will fall apart as you try to grab them with the tongs so you'll have to fish the meat out of the sauce.  Serve with baked beans and tater crowns for a meal even a four-year-old will love.


The Verdict:

This has become a favorite of Mr. Picky Pants.  We've had ribs twice in the last two weeks and both times we could not stop talking about how good they were.  It cost me only $6.50 for all the ribs, $2 for the BBQ sauce on sale, and nothing for the other ingredients I already had.  So we made enough ribs to feed two adults (with leftovers) for around $8.50 plus the cost of sides which was probably around $10.  That sure beats paying $19.99 a person for ribs that wouldn't taste nearly as good at a restaurant.  Mr. Picky Pants had baked potatoes with homemade ribs growing up, but I"m just too lazy to deal with that, so I resorted to tater crowns.  They are yummy with the sauce from the ribs on them.  These ribs are so good and so easy to make, you have to try them!